
Quick Fix: How to Punch an Extra Hole in Your Belt Safely
Weight fluctuates. Clothing styles evolve. Bodies change with seasons and life stages. Yet the holes pre-punched in your quality leather belt remain fixed. When your favorite belt no longer fastens comfortably at the middle hole, you face a choice: retire a perfectly good piece of craftsmanship, or learn how to punch a hole in a belt safely to restore that ideal fit.
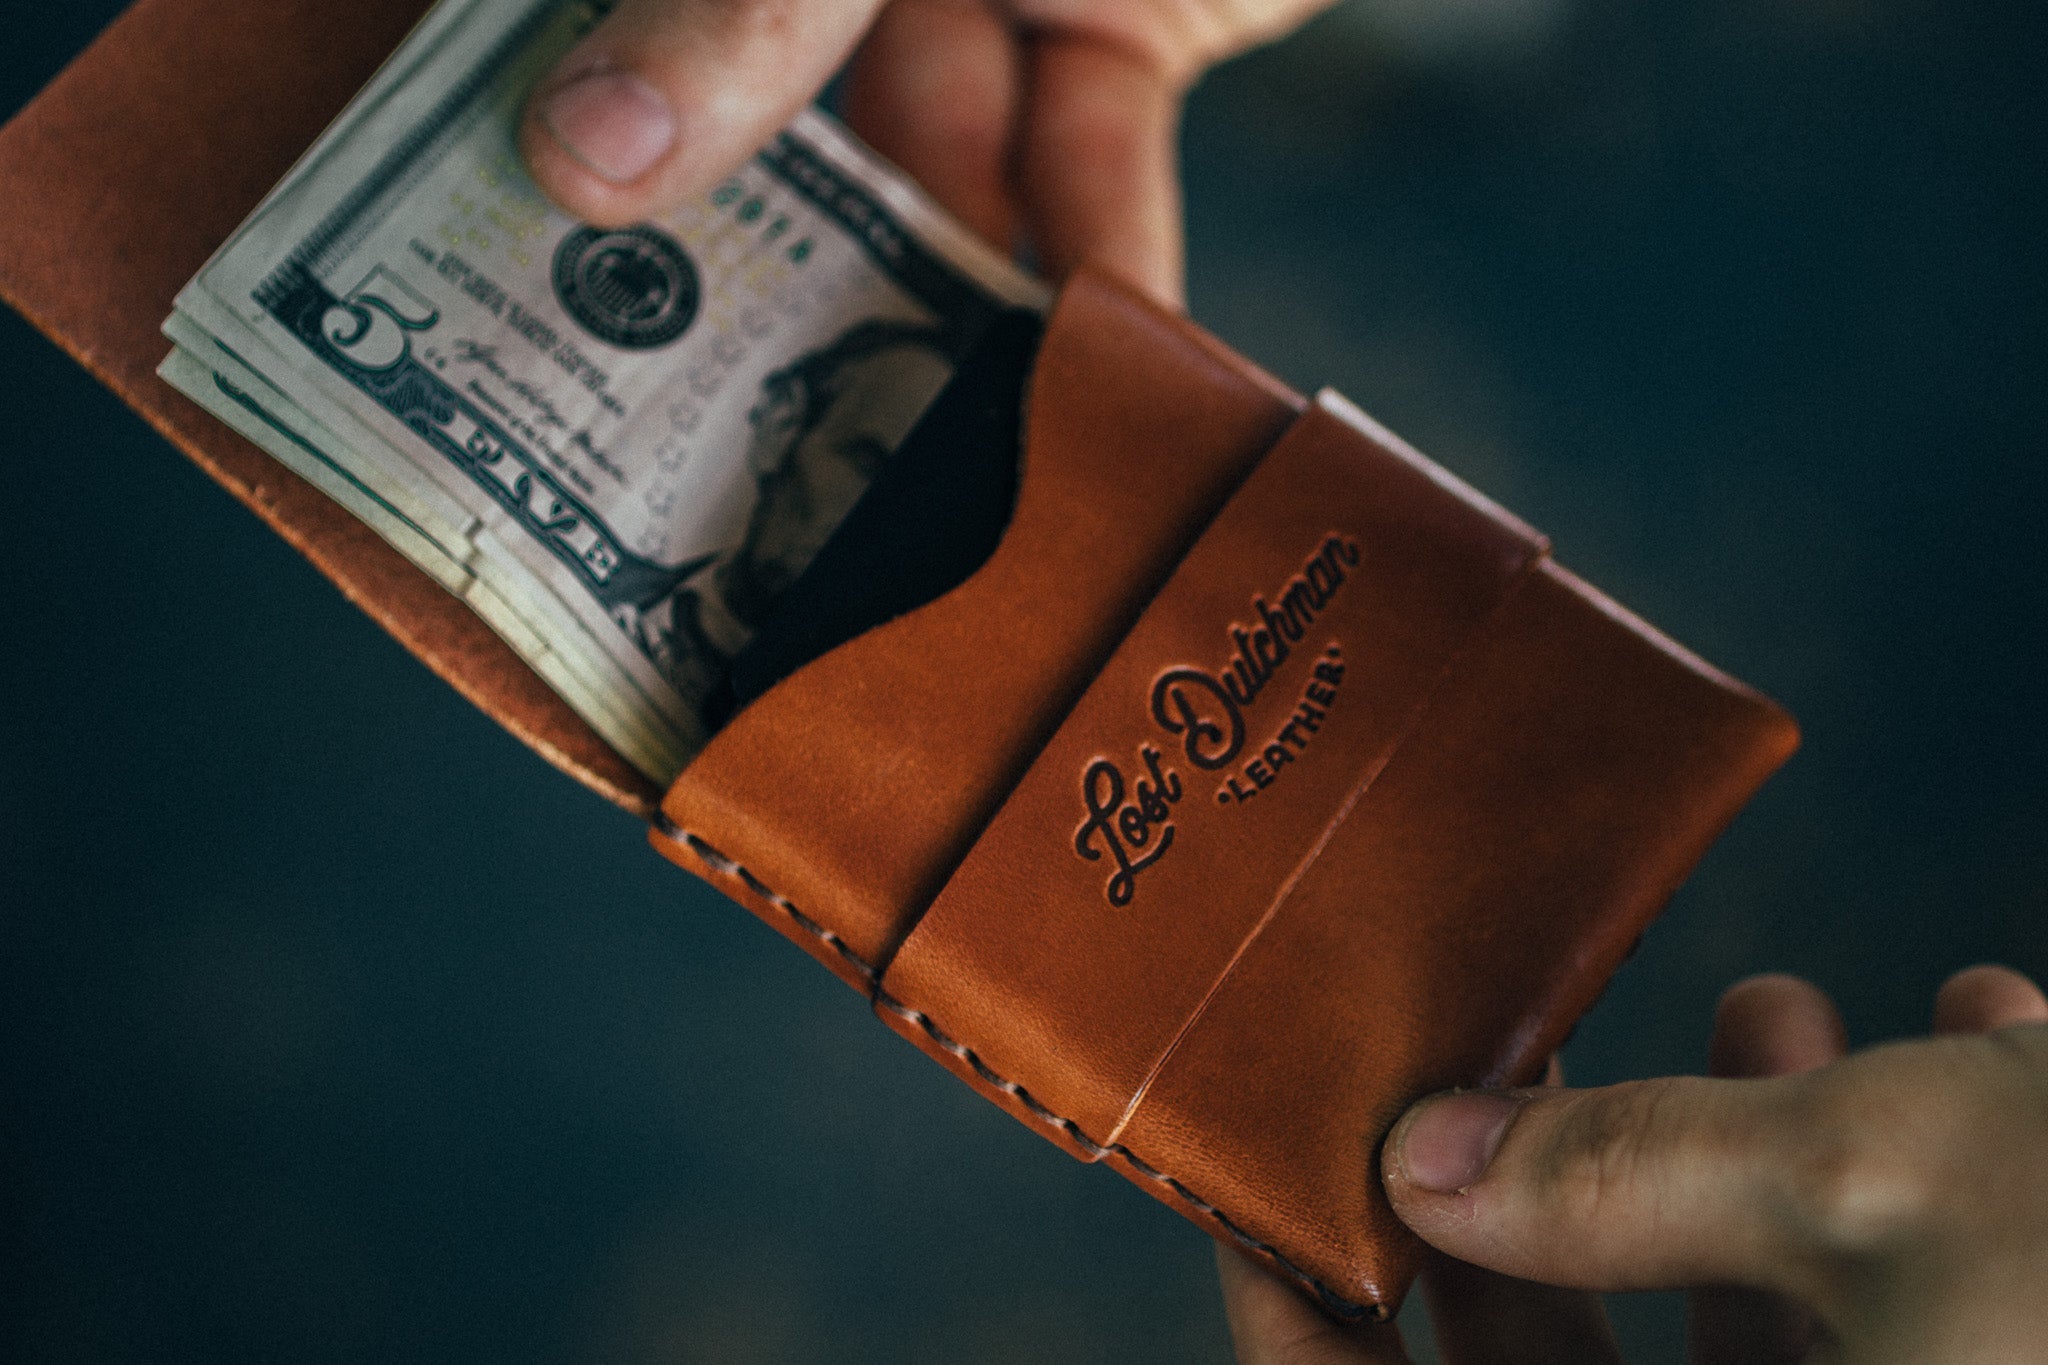
Adding an extra hole isn't admitting defeat; it's smart maintenance that extends the life of a premium investment. A well-made full-grain leather belt from Lost Dutchman Leather is built to last decades, and a simple modification ensures it continues serving you perfectly as your needs change. This guide walks through the proper technique for how to punch a hole in a belt without compromising its structural integrity or appearance.
Why You Might Need an Extra Hole in Your Belt
The need for an extra hole is more common than you might think. Weight loss or gain of even five to ten pounds can shift which hole provides the most comfortable fit. Seasonal changes matter too - winter layers add bulk around your waist, while summer clothes sit differently. Sometimes the original belt sizing was slightly off, or you simply prefer wearing the belt a bit higher or lower on your hips than originally intended.
The goal is always to fasten your belt at or near the middle hole. This position provides the best balance, allowing room for adjustment in either direction while maintaining proper tail length. When you're consistently using the tightest or loosest hole, it's time to add a new one. Understanding how to punch a hole in a belt correctly ensures you can adapt your gear to your body, not the other way around.
The Right Tools for the Job
Success in how to punch a hole in a belt depends entirely on having proper equipment. The right tools make the difference between a clean, professional-looking modification and visible damage that compromises your belt's appearance and longevity.
Essential Equipment for Punching Belt Holes
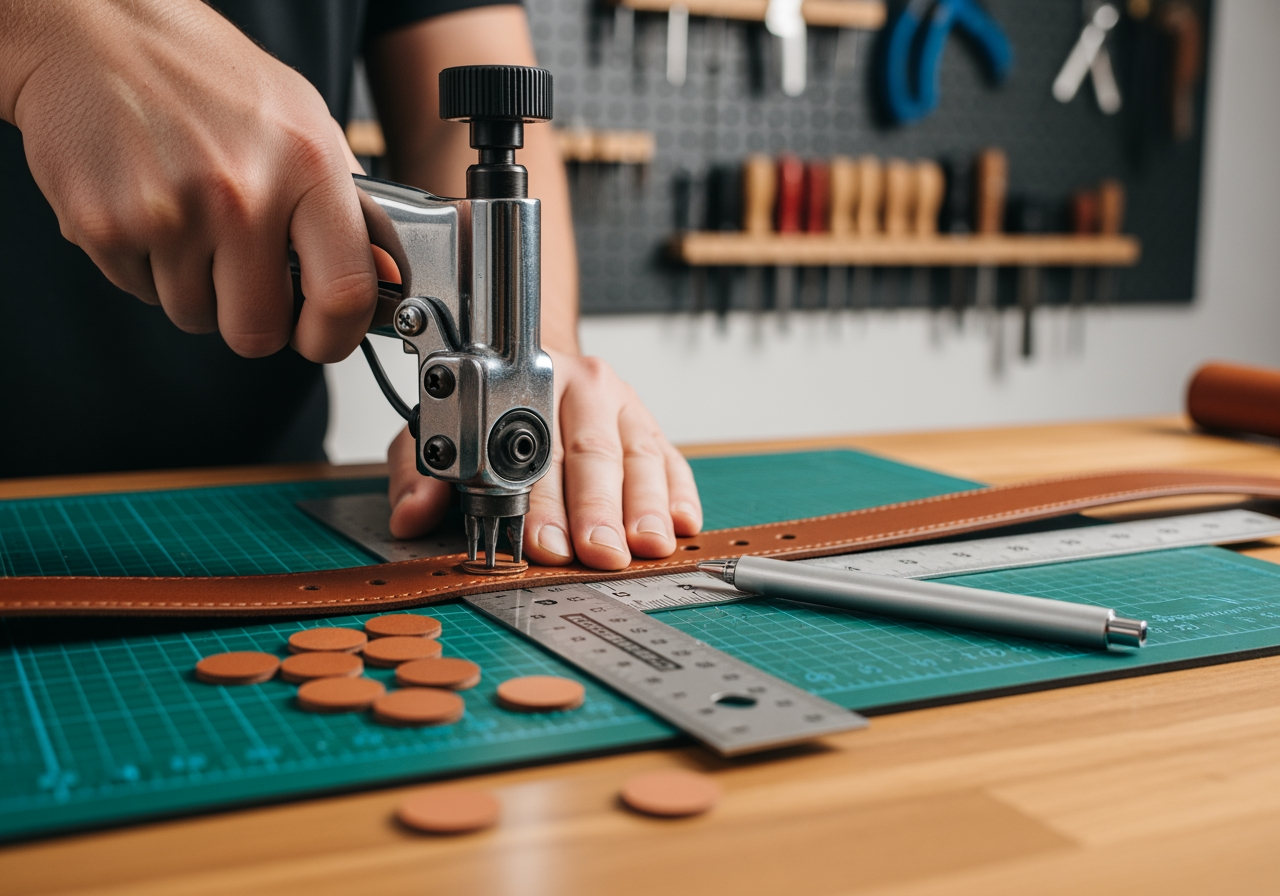
The most important tool when learning using a leather hole punch is the punch itself. A rotary-style leather hole punch is the gold standard. This tool features a revolving head with multiple punch sizes (typically 2mm to 4.5mm), allowing you to match the existing hole diameter perfectly. The handles provide mechanical advantage for clean punching through thick leather without excessive force.
You'll also need:
Cutting Mat or Thick Cardboard: Protects your work surface and provides firm backing that allows the punch to cut cleanly through.
Ruler or Measuring Tape: Ensures precise spacing between holes.
Marking Pen or Awl: Creates a visible guide mark for punch placement.
Clean Cloth: For wiping away leather dust and debris.
Investing in quality tools prevents the frustration and damage that comes from improvising. A good rotary punch costs less than replacing a damaged belt, and it serves for years across multiple projects.
Understanding Different Hole Punch Types
While rotary punches offer versatility, single-tube punches work well if you know the exact diameter needed. These hollow steel tubes with sharpened edges create clean holes when struck with a mallet. However, they require more setup and careful aim.
Avoid using household items like screwdrivers, ice picks, or heated nails. These approaches crack the leather fibers, create irregular holes, and can cause splitting that spreads over time. When using a leather hole punch designed specifically for the task, you maintain the integrity of the full-grain leather and ensure the modification lasts as long as the belt itself.
Step-by-Step Guide: How to Punch a Hole in a Belt Safely
With proper tools assembled, the actual process of how to punch a hole in a belt becomes straightforward. Precision and patience produce results indistinguishable from factory holes.
Measuring and Marking Your New Hole
Start by wearing your belt with your typical clothing. Fasten it where it feels most comfortable, even if this requires pulling the leather tighter or looser than existing holes allow. This is your target position.
Remove the belt and lay it flat on a clean surface. Measure the spacing between existing holes - quality belts typically use one-inch intervals. Use this same measurement to mark where your new hole should fall. The spacing must remain consistent to maintain the belt's balanced appearance.
Mark your new hole location with a small dot using a marking pen or by pressing an awl to create a shallow indentation. Double-check your measurement. Once you punch, there's no undoing the modification. Take time here to ensure accuracy when using a leather hole punch for permanent modification.
The Punching Process
Place your leather belt on the cutting mat or thick cardboard backing. Position the belt so the marked spot sits directly over firm support without any gaps underneath.
Select the punch size that matches your existing holes. On a rotary punch, rotate the wheel until the correct size is aligned with the handles. Position the punch precisely over your mark. The cutting edge should be perpendicular to the leather surface, not angled.
Apply firm, steady pressure to the handles. The punch should cut through in one smooth motion. Don't wiggle the punch or make multiple attempts at the same spot - this creates enlarged or irregular holes. A proper punch driven straight through produces a clean circle with defined edges.
After punching, inspect the hole. If small leather fragments remain around the edge, gently remove them with your fingers or a soft brush. You can lightly sand any rough edges with fine-grit sandpaper, but this is rarely necessary with a sharp punch and proper technique.
Finishing Touches After Punching
The area around a new hole can dry out from the cutting process. Apply a small amount of leather conditioner with a clean cloth, working it gently into the leather around the new hole. This prevents cracking and helps the modified area blend seamlessly with the rest of the belt.
Test the fit before wearing the belt regularly. Thread the buckle through and fasten at your new hole. It should feel comfortable and secure without being too tight or loose. The tail should extend past the first belt loop but not hang excessively long.
Common Mistakes to Avoid
Even with proper tools, certain errors can compromise results when learning how to punch a hole in a belt:
Punching Without Measuring: Eyeballing hole placement leads to uneven spacing that looks unprofessional and can cause the buckle to sit crooked.
Using Wrong Size Punch: A hole too small won't accept the buckle prong. A hole too large allows excessive movement and accelerates wear.
Forcing Punch at Wrong Angle: Tilting the punch creates oval holes rather than clean circles. Always maintain perpendicular positioning.
Punching Through Stitching: Adding holes in reinforced or decorated areas can damage structural stitching. Stay in the main belt strap area, avoiding any sewn sections.
Skipping Backing Material: Punching on a soft surface or directly on a table creates ragged edges and can damage the work surface.
Taking time to avoid these pitfalls ensures successful results when using a leather hole punch for the first time.
When to Get Professional Help
While how to punch a hole in a belt is a manageable DIY task for standard belts, certain situations call for professional assistance:
Complex Belt Designs: Belts with braiding, tooling, inlays, or decorative elements require experienced handling to avoid damaging the artistic work.
Very Thick or Exotic Leathers: Some materials need specialized industrial punches that provide greater force than handheld tools can deliver safely.
Multiple Holes in Specific Patterns: Creating evenly-spaced holes for double-prong buckles or decorative purposes benefits from professional layout and execution.
Lack of Proper Tools: If you don't have access to a quality leather punch and won't use it again, paying for professional hole-punching costs less than buying tools for a single use.
Most professional leather workers or shoe repair shops offer hole-punching services for a nominal fee. This is especially worthwhile for expensive or sentimental belts where any mistake would be costly.
Maintaining Your Belt After Modification
Once you've successfully added a hole, proper maintenance ensures your modified belt serves you well for years. Full-grain leather responds to care, and a belt that's been customized deserves the same attention as any premium leather accessory.
Regular Conditioning: Apply leather conditioner every two to three months, paying extra attention to the area around your new hole. This prevents the leather from drying and cracking under stress.
Proper Storage: When not wearing the belt, hang it on a belt rack or hook, or coil it loosely. Never fold a belt sharply at the new hole - this can create permanent creases.
Rotate Hole Usage: If your weight fluctuates seasonally, alternating between holes distributes wear more evenly across the belt. No single point bears all the stress.
Watch for Stretching: Leather naturally stretches with use. If the area around your new hole begins elongating, you may need to add another hole or have the belt professionally resized. Quality handcrafted wallets and belts are made to adapt, but physics still applies.
Alternative Solutions Before Punching
Before committing to how to punch a hole in a belt, consider whether alternatives might solve your fit issue:
Try Different Notches First: You might find an existing hole you overlooked works better than you thought. Sometimes adjusting how you thread the belt through loops changes the effective length.
Belt Stretching: If you need just a fraction of an inch more length, wearing the belt regularly can stretch full-grain leather slightly. This is temporary but sometimes sufficient.
Evaluate New Belt Investment: If your weight has changed substantially or you're between sizes on multiple belts, purchasing a properly-sized new belt might be more practical than modifying several pieces. Quality bifold wallets and belts represent long-term investments, and having the right size matters.
Professional Resizing: Some leather workers can remove a section of belt and resew it to change the overall length. This preserves original hole spacing while adjusting size dramatically.
These options won't always apply, but they're worth considering before permanently modifying your belt.
Conclusion and Next Steps
Learning how to punch a hole in a belt safely empowers you to maintain your quality leather goods through life's inevitable changes. With the right tools - primarily a good rotary leather punch - and careful technique, adding holes becomes a simple five-minute task that extends the life of a premium belt by years or decades.
The key principles remain straightforward: measure twice, punch once. Use proper backing material, match the existing hole diameter, and maintain perpendicular positioning. When using a leather hole punch correctly, the results are indistinguishable from factory work, and your belt continues serving faithfully through weight changes, style shifts, and seasonal variations.
For belts and accessories built to last a lifetime and adapt to your changing needs, quality matters from the start. Explore the full collection of full-grain leather goods designed for durability and longevity. If you have questions about belt care, modification, or customization options, please contact us for personalized guidance.
